Your iPhone or iPad stores all your photos, messages, health data, documents, accessory setups, settings, and more. Your data is important, even precious, and should be treated as such. While you can (and should) be backing up your iPhone and iPad via iCloud it may be best to have an archived backup in case something ever goes really wrong.
Archiving will prevent your current backup from being overwritten by a backup in the future. Should you want or need to revert to an old state for your iPhone or iPad, it's always there for you to access. This is a common practice that we suggest for anyone who decided to try on Apple's beta versions of a new iOS.
How to make an archived backup of your iPhone or iPad
Before you begin, make sure you back up your iPhone or iPad. While the beta process is fairly straightforward, any time you make any significant change to your device you risk problems. And with your personal data, it's always — always! — better to be safe than sorry. Even if you back up every night, you'll want to make sure it's absolutely up-to-date.
- Plug iPhone or iPad into your Mac or Windows PC.
- Launch iTunes.
- Click on the iPhone or iPad icon in the menu bar when it appears.
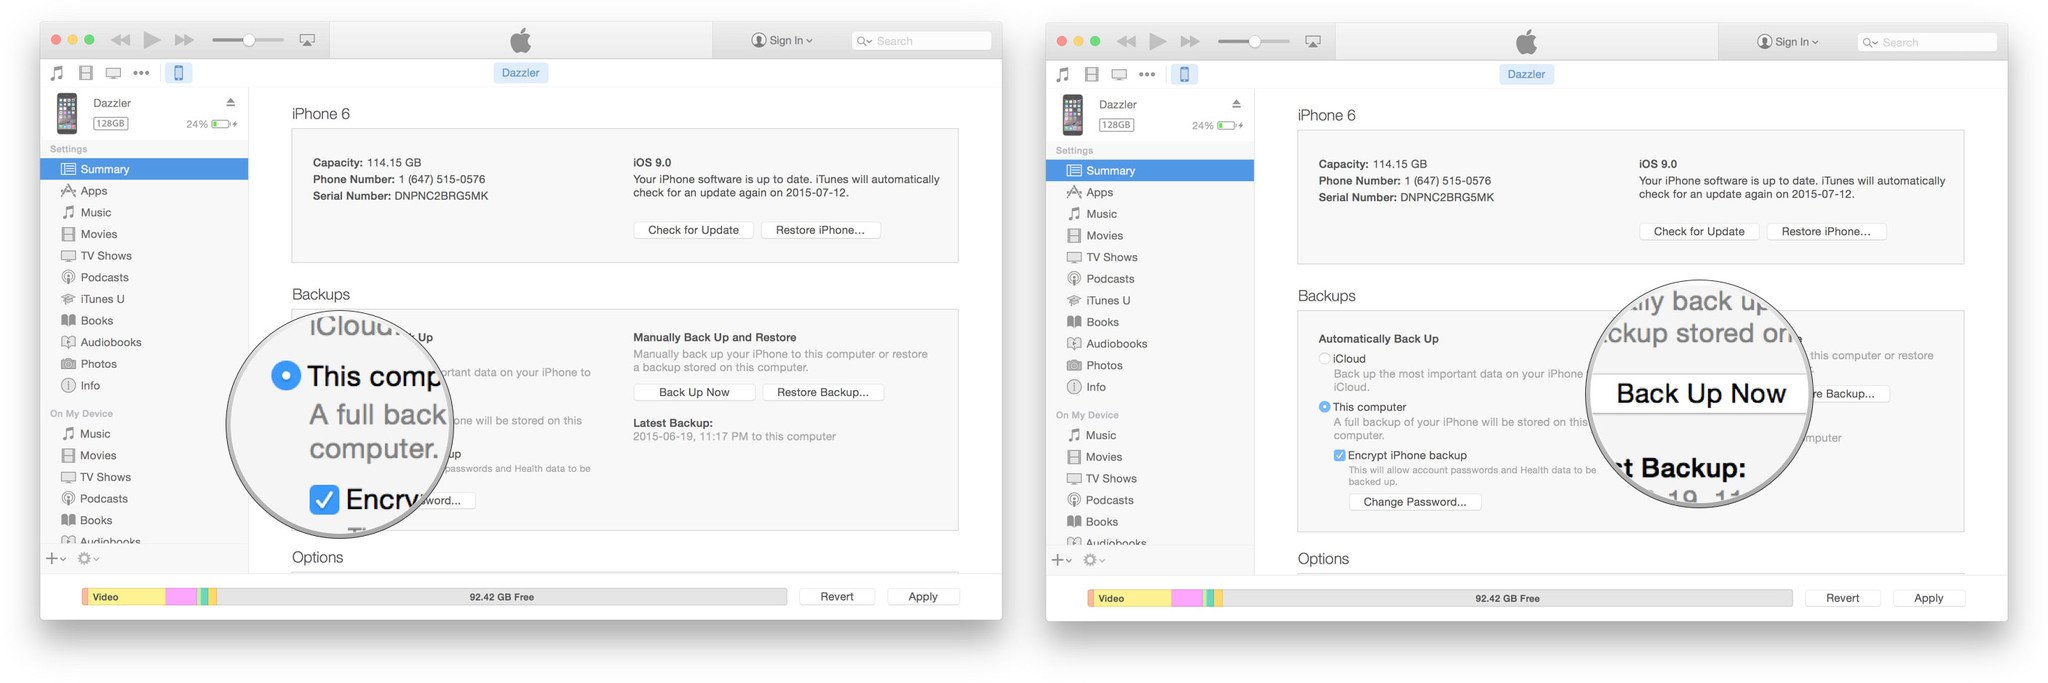
- Make sure backup is set to This Computer. (And enable Encrypted backup — it's worth it!)
- Click on Back Up Now. (Click on Encrypt Backup and add a password — you want the security.)
- Back up Apps, if asked.

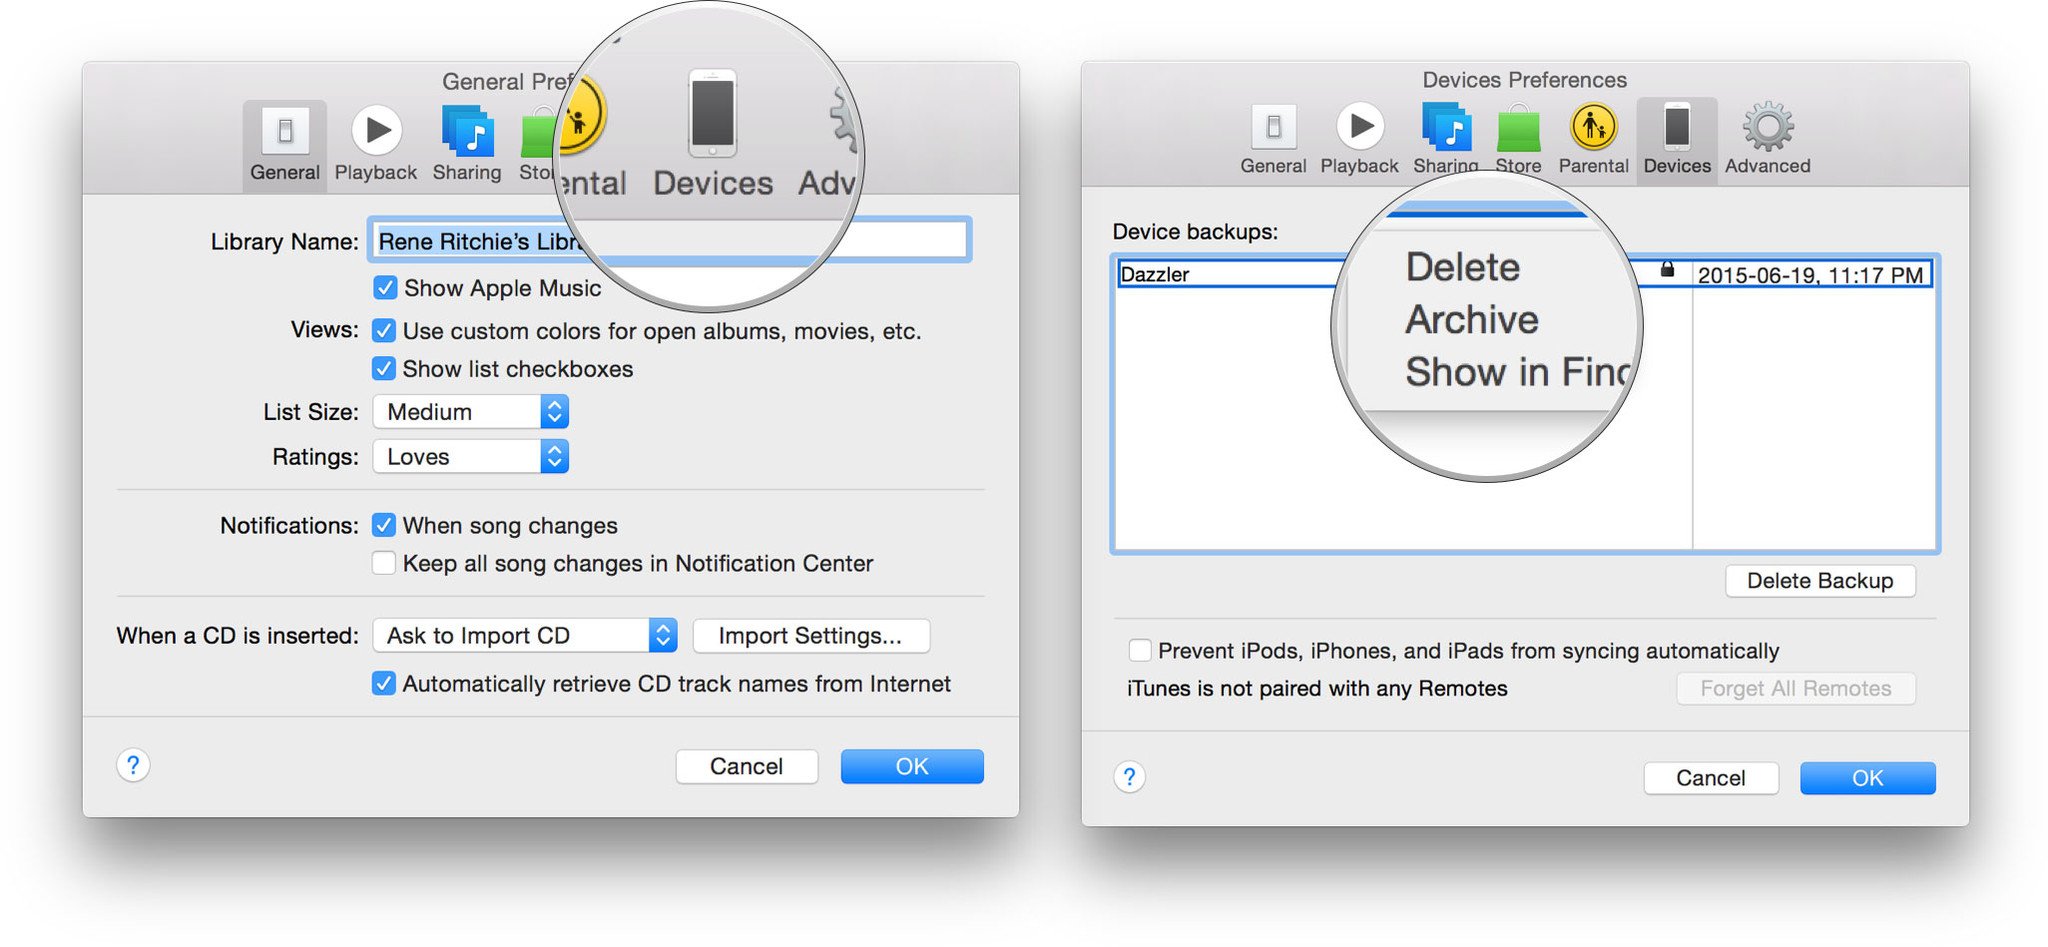
- Press Command, to open Preferences. (Or go to iTunes in the menu bar and click on Preferences.
- Click on the Devices tab.
- Control-click on your Backup and choose Archive.

Any questions?
Let us know in the comments down below!
from iMore - The #1 iPhone, iPad, and iPod touch blog https://ift.tt/2GTTypn

Comments
Post a Comment