You may not have an optical drive on your daily Mac, but that doesn't mean you can't access files from a CD or DVD.
One of the things I missed the most when I replaced my late 2012 MacBook Pro with my brand new MacBook Pro is the optical drive. I didn't really use it that often, but I did use it, and I knew I'd miss it. Yes, an external CD/DVD drive works just fine and iCloud (as well as other cloud-based services) have made it easy to transfer files digitally. But in a pinch, you might just want to access files from a disc on another computer.
This is where Remote Disc comes in. It's a Mac feature that lets you view and access files on a Mac or PC with an optical drive from a Mac that doesn't have one. Here's how to set up and use it.
- The minimum requirements
- How to set up Remote Sharing on Mac
- How to set up Remote Sharing on Windows PC
- How to access files from a Remote Disc on your Mac
- How to disconnect your Mac from the Remote Disc on another computer
The minimum requirements
Most importantly, the Mac you are trying to access a Remote Disc from can't have a built-in optical drive. If it does, you just won't see Remote Disc as an option in Finder.
The disc you are trying to access must also support Remote Disc. Remote Disc does not support certain types of media, mainly copy-protected media like movies and music. You can't access audio CDs, Blu-ray or DVD movies, copy-protected games, recordable CDs or DVDs that you want to burn or erase, and Microsoft installation discs.
How to set up Remote Sharing on Mac
From one Mac to another, Remote Disc is just about as simple as can be. It's just a matter of ticking a box in your System Preferences.
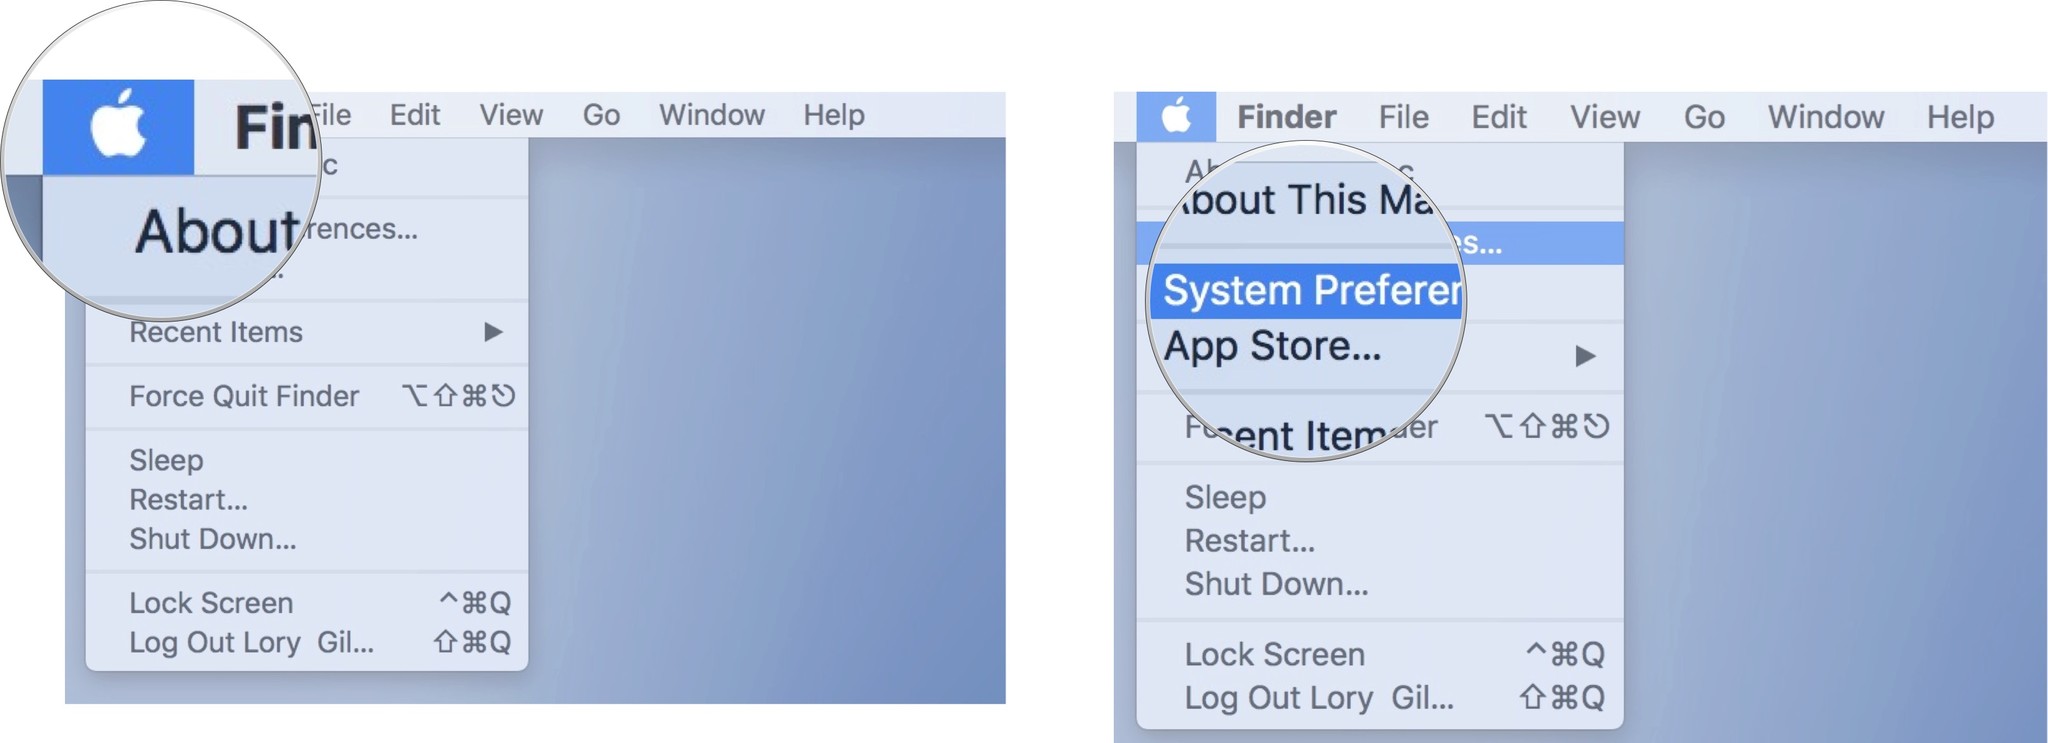
- On the Mac with an optical drive, click on the Apple Menu icon.
-
Launch System Preferences.
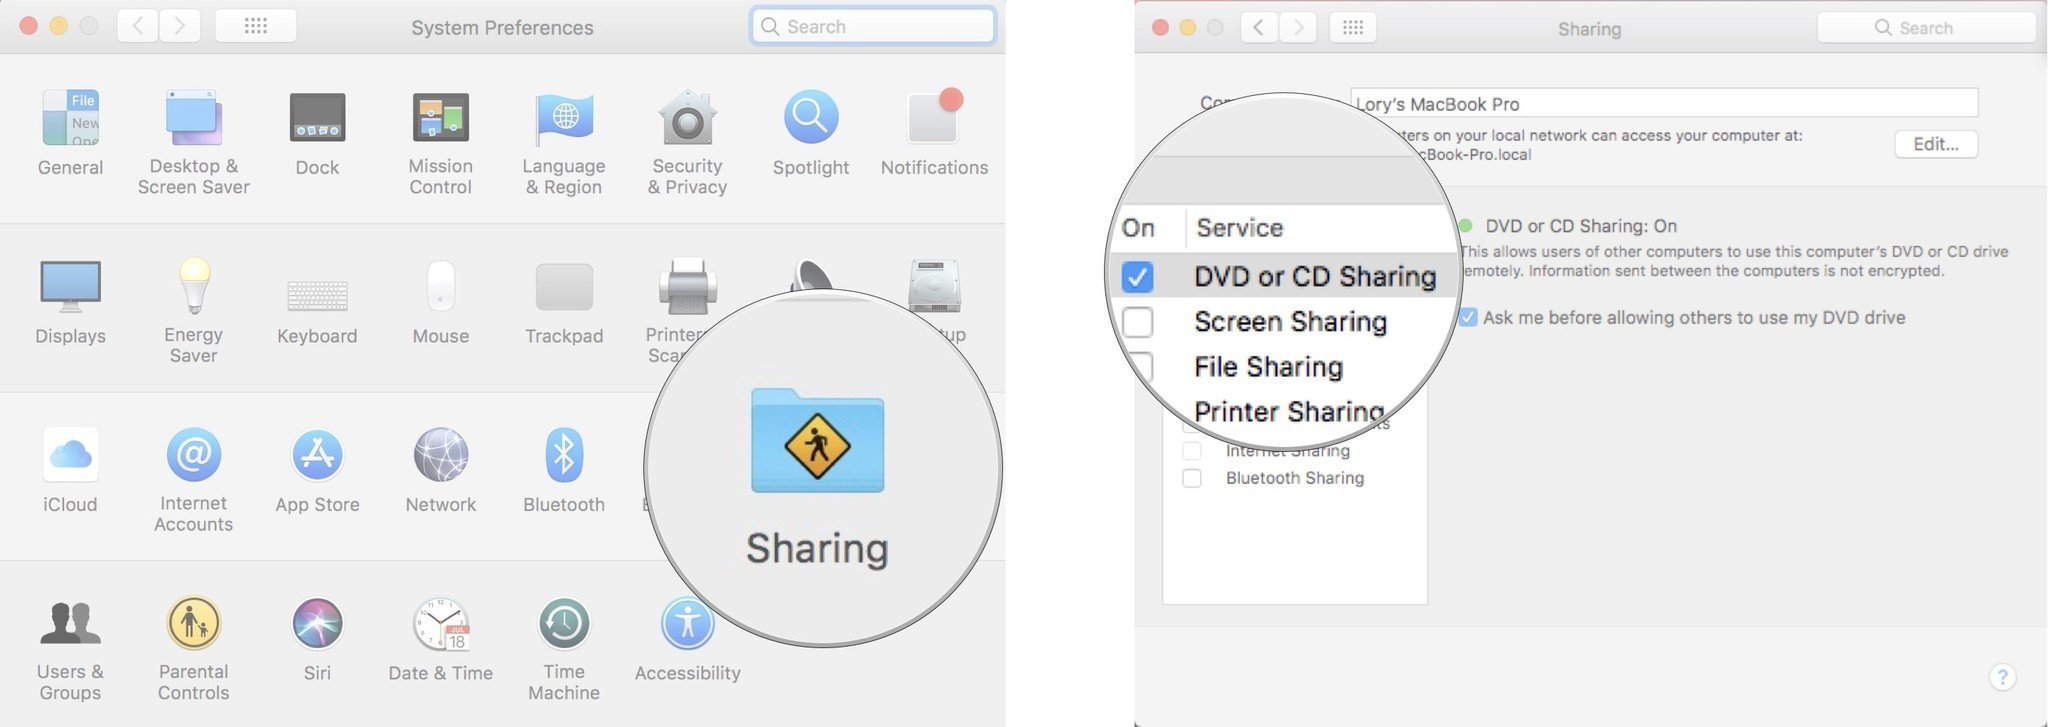
- Click on Sharing.
-
Tick the box for DVD or CD Sharing.
-
To protect your content, tick the box for Ask me before allowing others to use my DVD Drive.
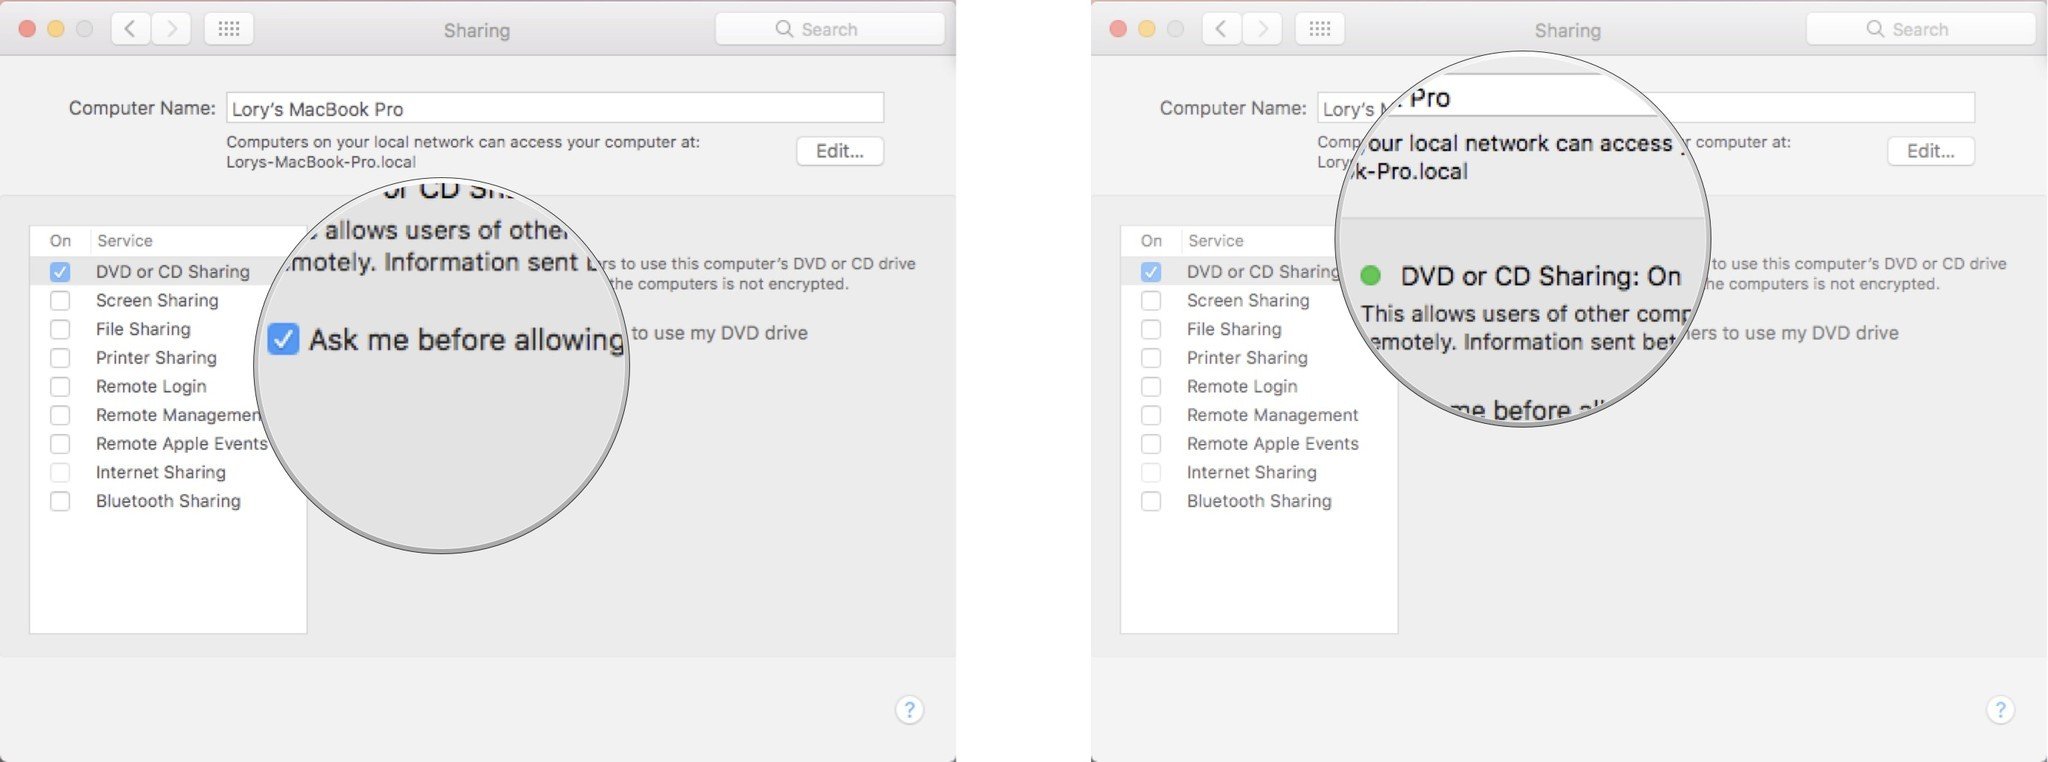
When DVD or CD sharing is on, a green light will appear on the Sharing page.
How to set up Remote Sharing on Windows PC
Sharing your CD or DVD drive from a PC is not any harder than sharing from a Mac, but you do have to install some additional software first.
- Download and install Apple's DVD or CD Sharing software onto the PC.
- Open your PC's Control Panel.
- Click on Hardware and Sound.
- Click on DVD or SD Sharing Options.
- Tick the box for DVD or CD Sharing.
- To protect your content, tick the box for Ask me before allowing others to use my DVD Drive.
If your PC has firewall software in place, add ODSAgent and RemoteInstallMacOSX to the programs that your firewall will allow.
How to access files from a Remote Disc on your Mac
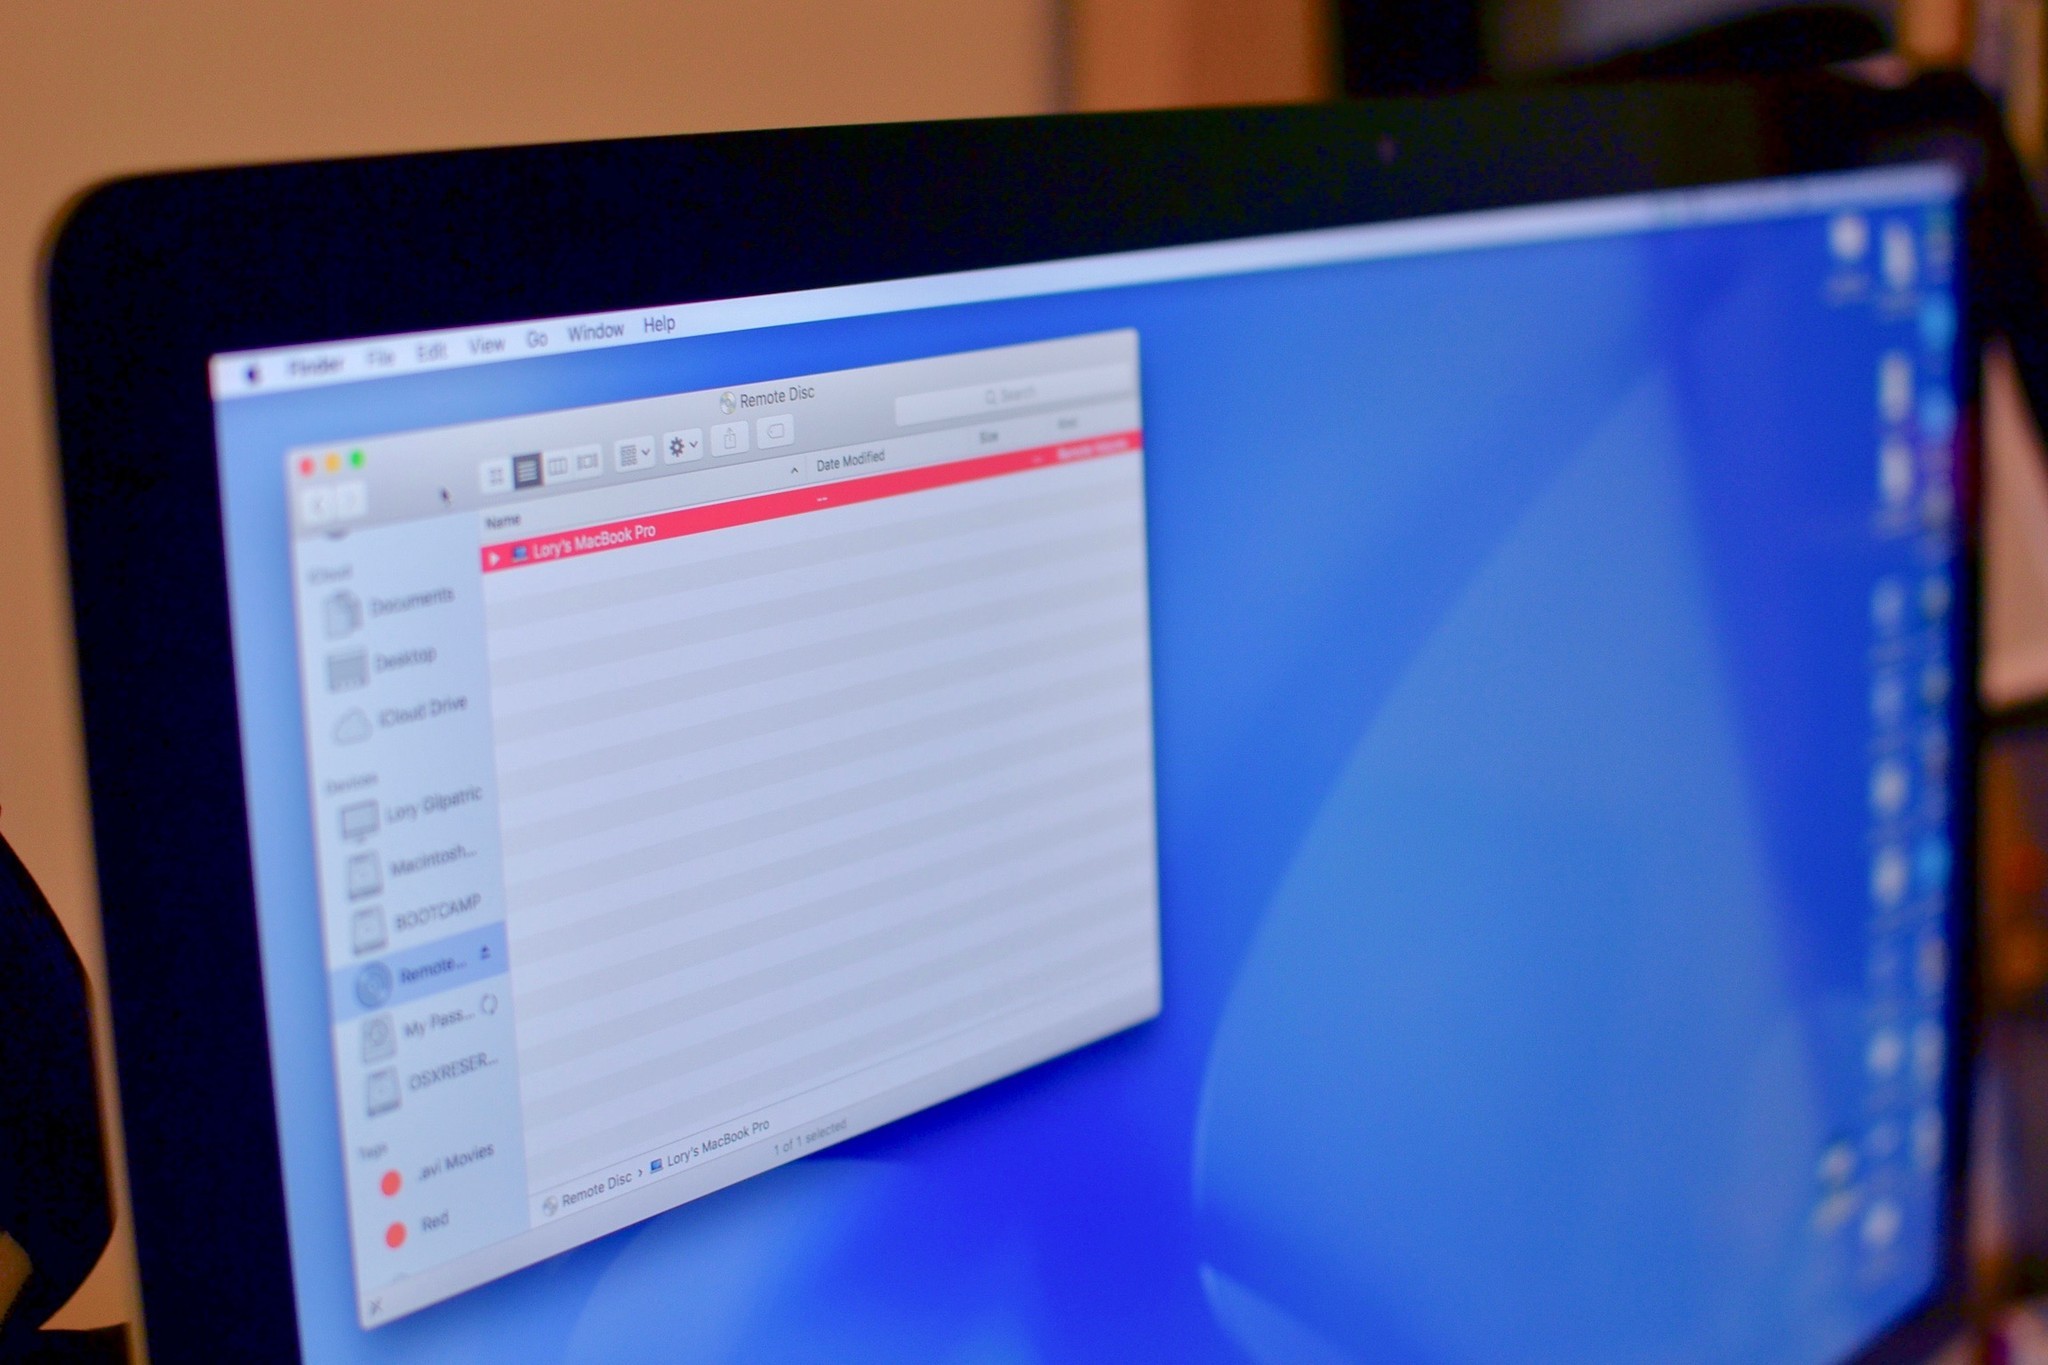
Once you've enabled Remote Disc on either a Mac or a PC with an optical drive, you can access it in Finder on your Mac.
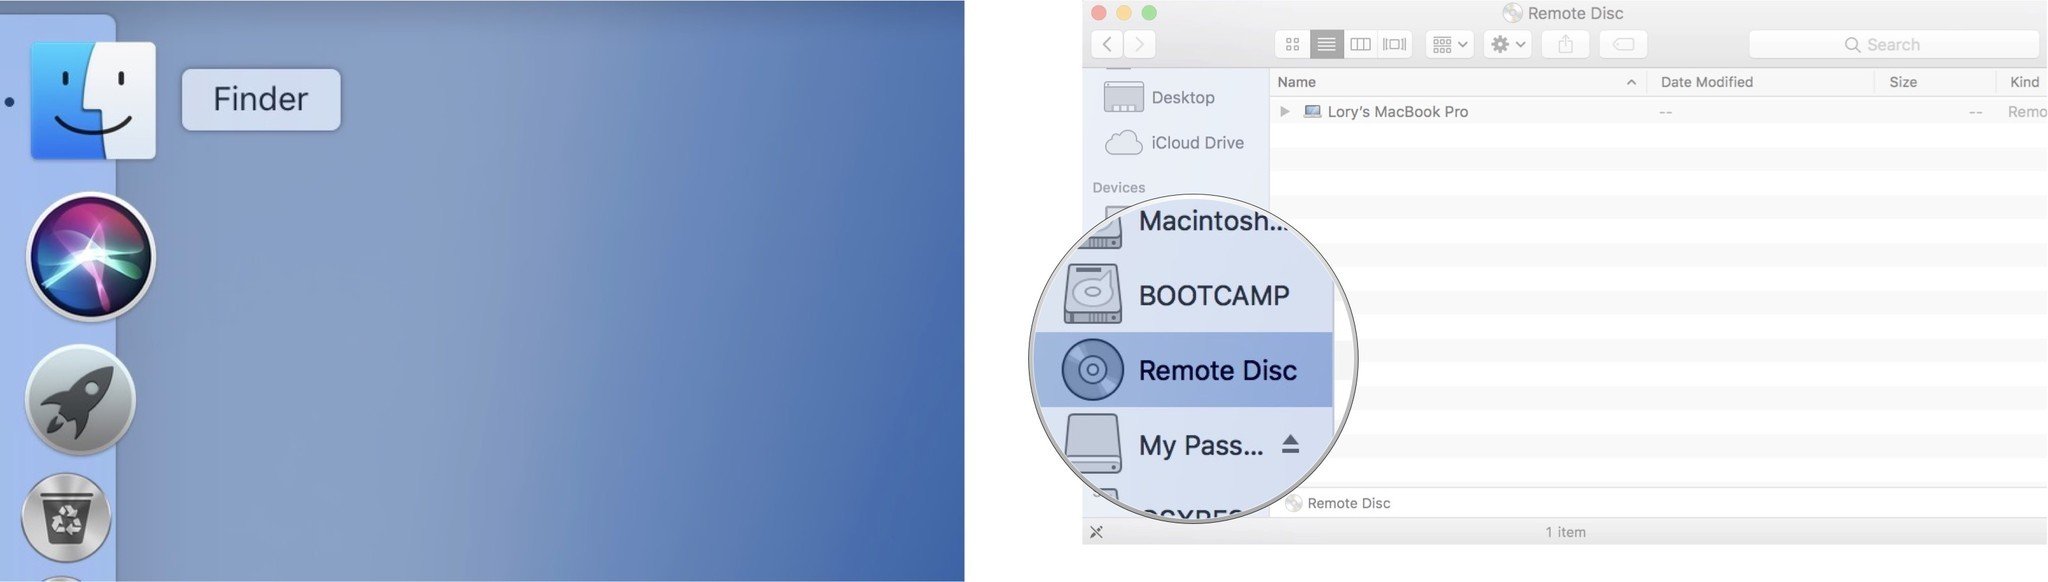
- Open a Finder window on the Mac without an optical drive.
-
Scroll down the sidebar menu and select Remote Disc under Devices.
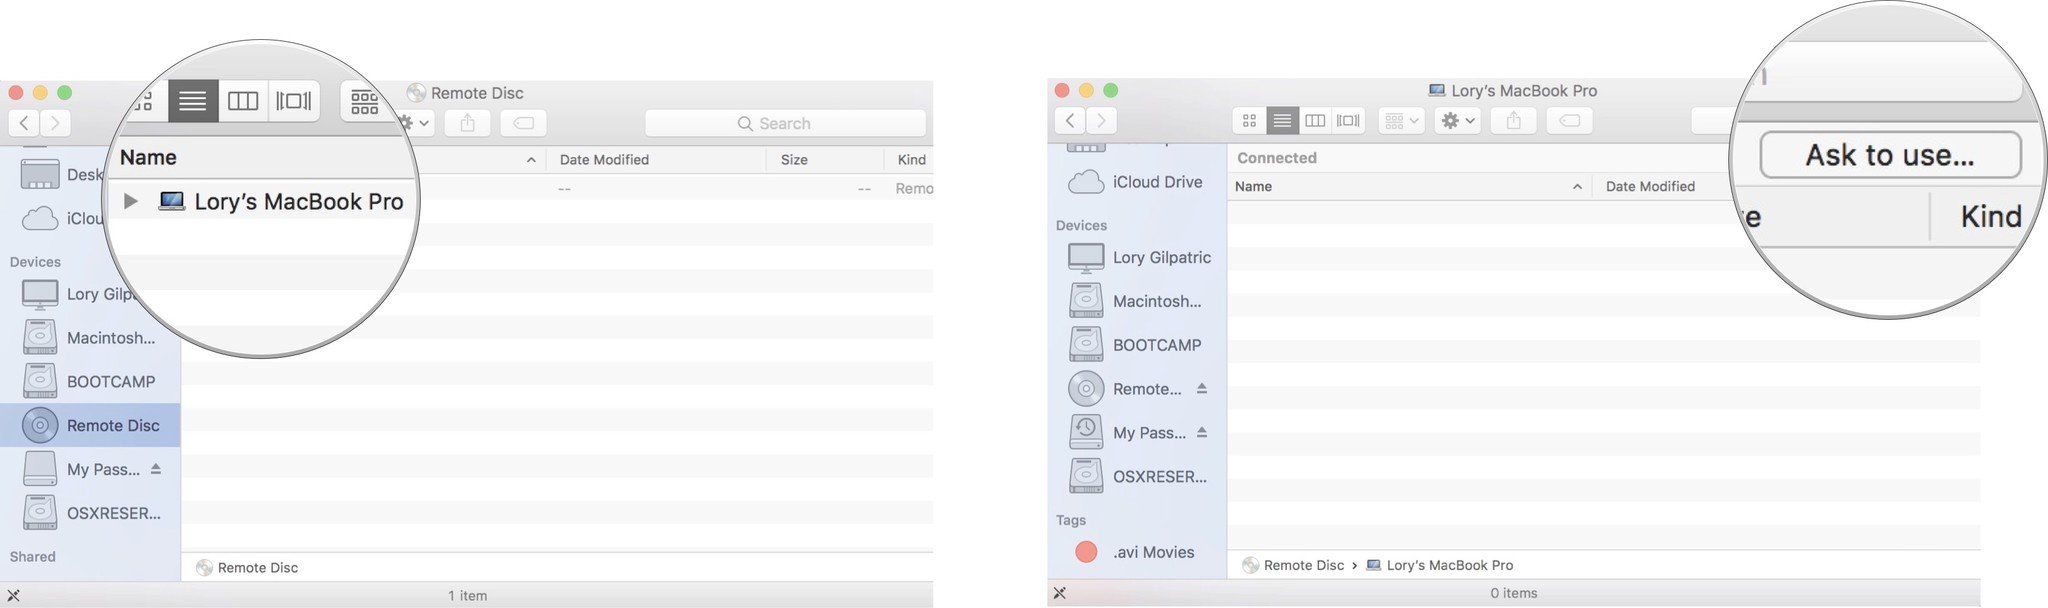
- Double-click on the Computer that you want to access the optical drive from.
-
Click Connect or Ask to Use in the upper left corner of the Finder window.
-
If you have enabled the requirement to ask first, go back to the computer with the optical drive and click Accept.

After you've connected to the computer with the optical drive, you'll see the files in the CD or DVD. Double click on a file to open it or drag the file to your desktop to save a copy.
How to disconnect your Mac from the Remote Disc on another computer
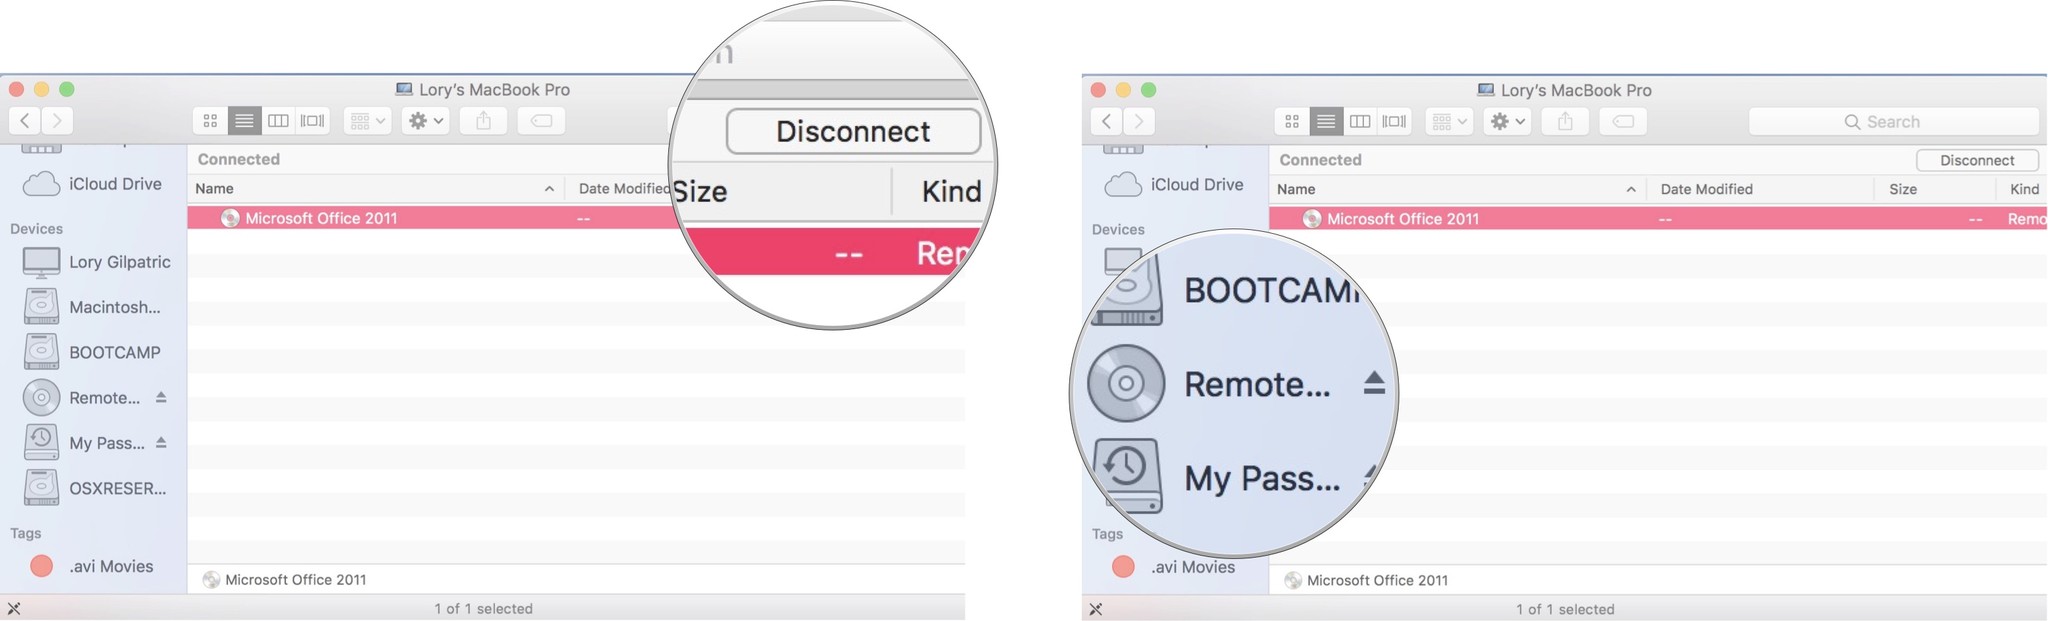
When you're finished getting what you need from the CD or DVD on the computer with the optical drive, you can disconnect from it by clicking on Disconnect in the upper left corner of the Finder window.
If you don't see the Disconnect button in Finder, you can click on the Eject button next to Remote Disc in the sidebar of the Finder window.
You can also simply eject the CD or DVD from the computer with the optical drive. You will be prompted to confirm that you want to remove the disc.
Any questions?
Do you have any questions about accessing a Remote Disc on your Mac? Put them in the comments and I'll help you out.
Updated February 2018: Rewrote for macOS High Sierra.
from iMore - The #1 iPhone, iPad, and iPod touch blog http://ift.tt/2Fz9mwY
Comments
Post a Comment